Node search
Node search is a dedicated search surface for the discourse nodes in your vault. It ranks matches as you type, previews the highlighted note beside the list, and lets you narrow by node type, reorder the results, and act on the one you want without leaving the keyboard.
Obsidian’s built-in quick switcher searches every note in your vault. Node search only looks at your discourse nodes, so a question or claim you half-remember is not buried under meeting notes and daily notes.
Note: This feature is currently in beta. The search modal is sized for desktop and is not yet adapted for mobile.
Open the search
- Open the command palette with
Cmd/Ctrl + P - Search for “node search” and select Discourse Graph: Open node search
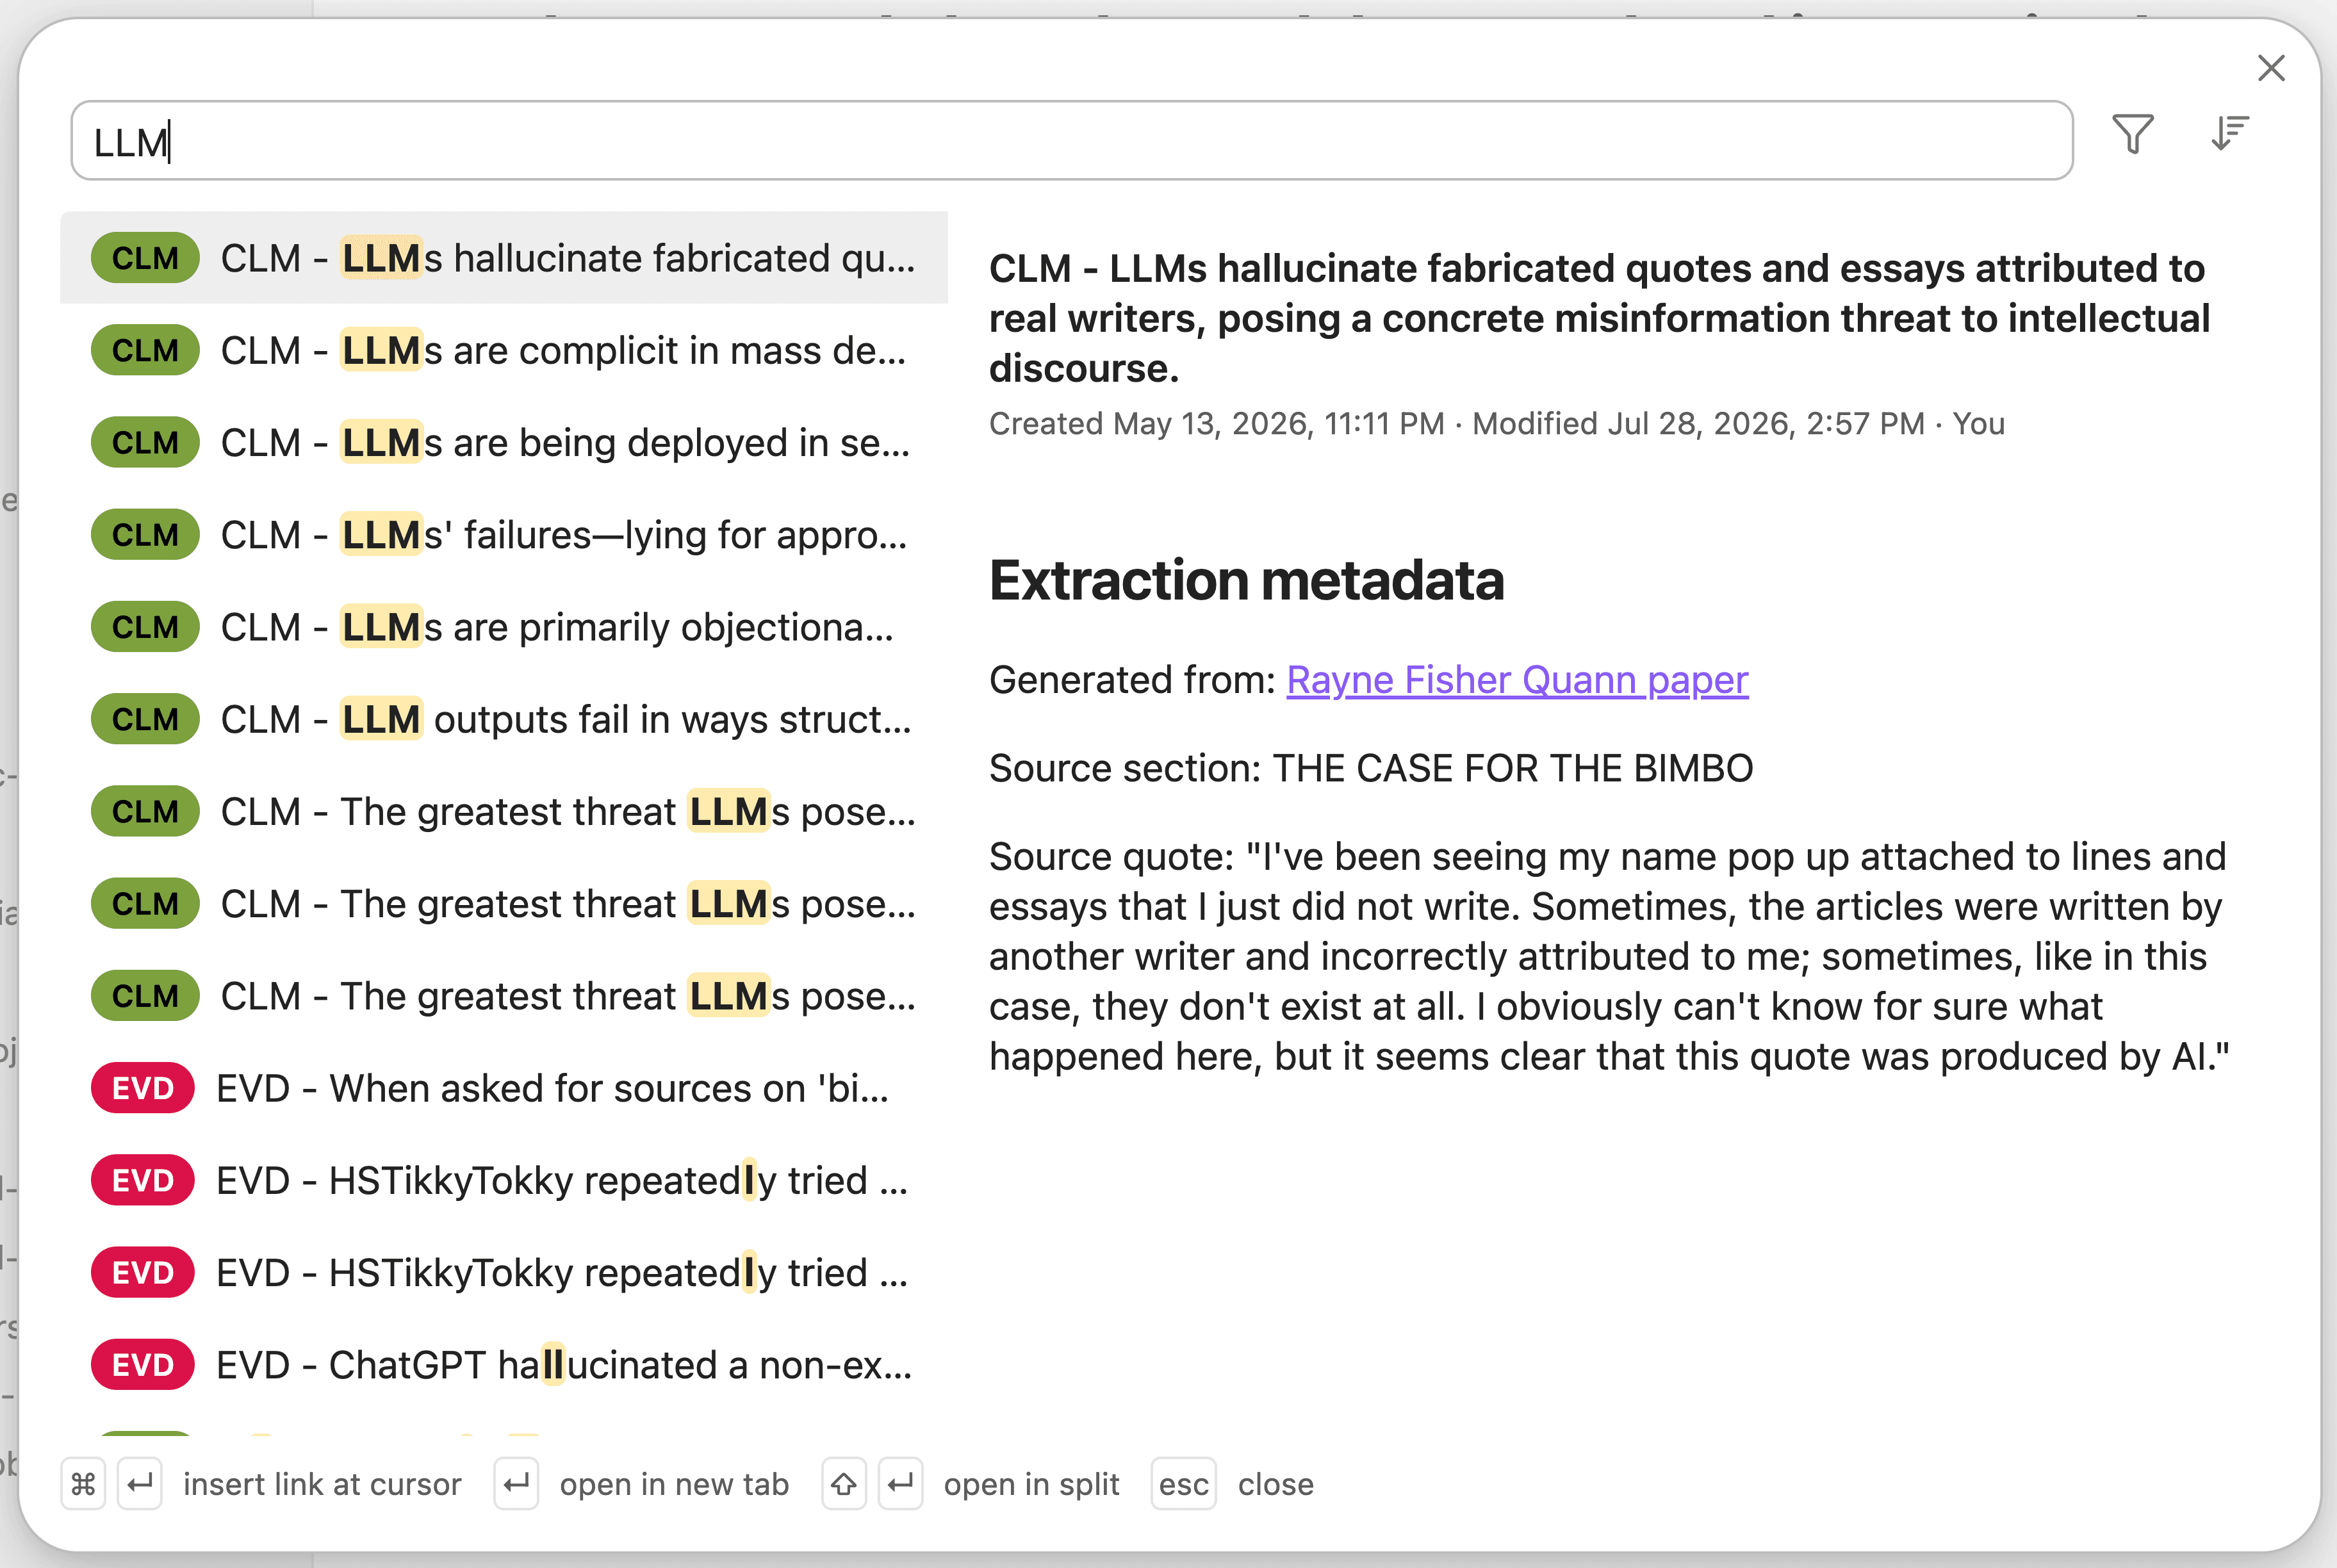
The command ships without a hotkey. To give it one, open Obsidian settings → Hotkeys, search for “node search”, and assign the shortcut you want. See Command palette integration for more on customizing Discourse Graph commands.
Read the results
Type to rank your discourse nodes by title, with matched characters highlighted. Each row carries a colored badge for its node type, using your node tag colors. The right-hand pane previews the highlighted result — title, creation and modification times, and author. Use ↑ and ↓ to move the highlight, or hover a row.
- Search matches note titles only, not note bodies.
- Only notes recognized as discourse nodes appear. If one is missing, it likely has not been identified yet — see Bulk identify discourse nodes.
- An empty search field lists every discourse node alphabetically, so filtering and sorting are useful on their own.
Filter by node type
There are two ways to narrow results to particular node types. Both drive the same filter, so you can start with one and finish with the other.
From the filter dropdown
Click the funnel icon to the right of the search field and tick the node types you want.
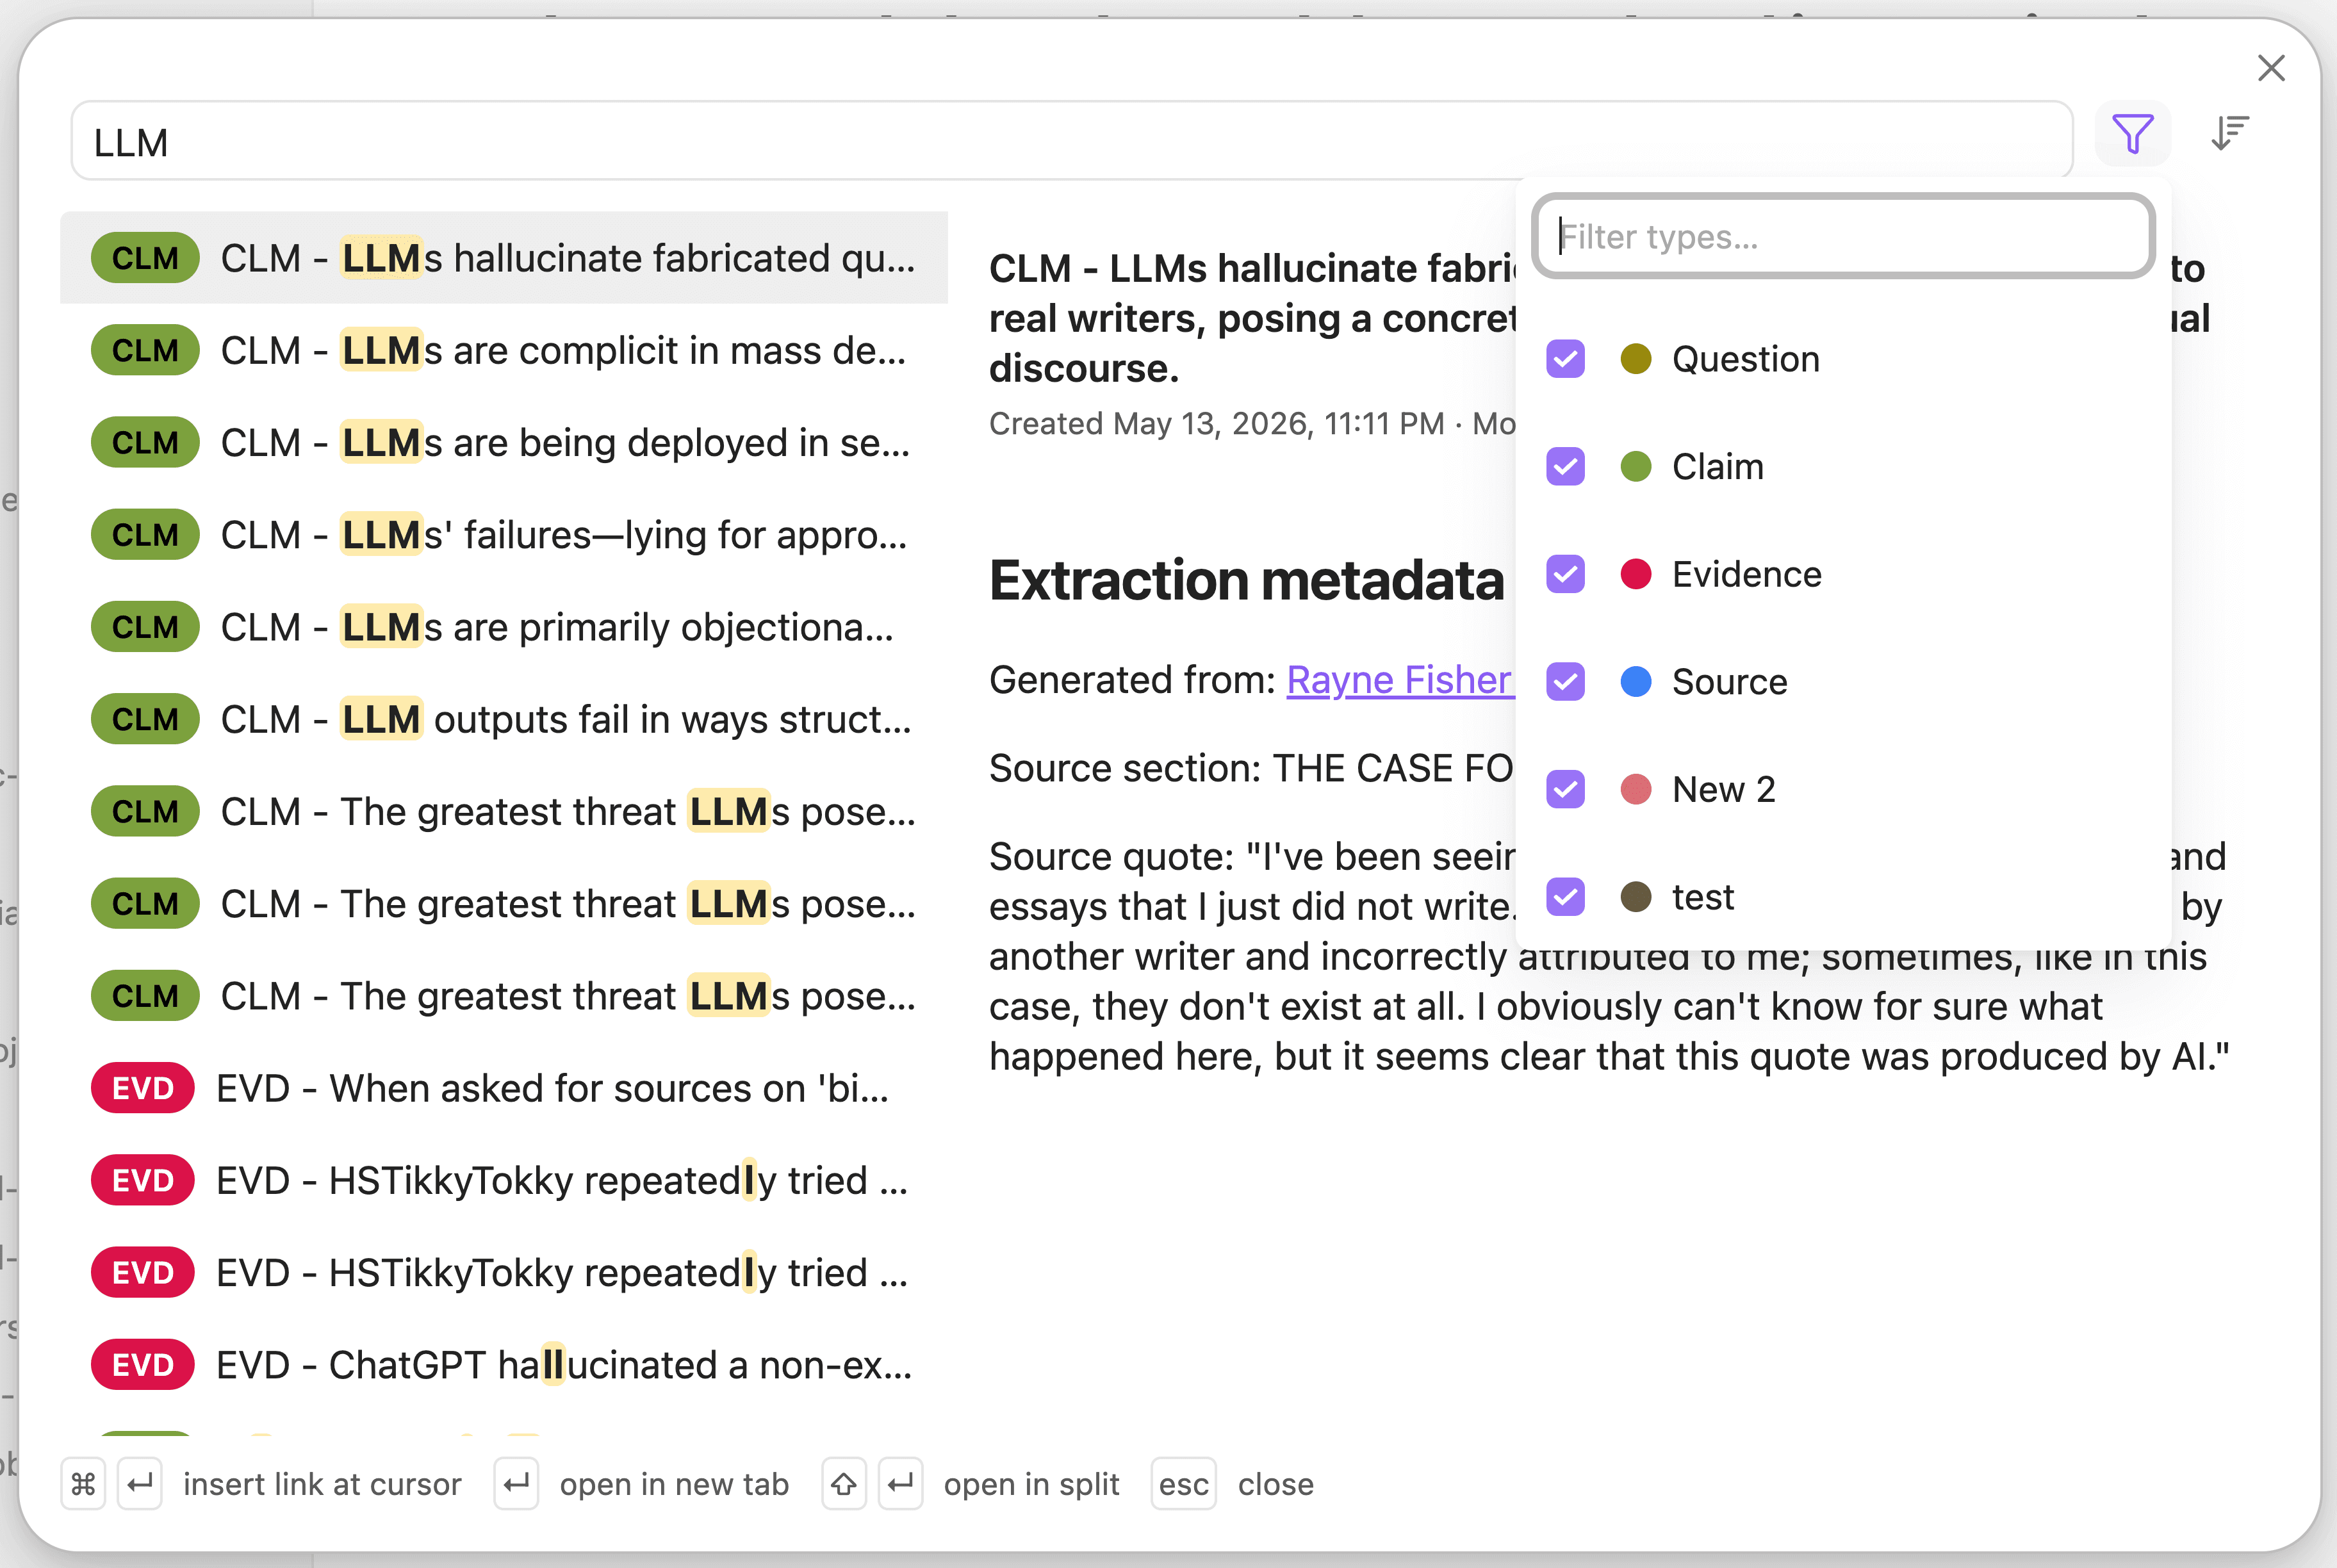
- Only — appears when you hover or focus a row, and narrows the filter to that single type
- Clear filter — removes the filter entirely and shows the count of types currently selected
- A Filter types… box appears once you have more than seven node types configured, so a long list stays manageable
A badge on the funnel icon shows how many types are selected. Selecting every type is the same as selecting none — both show all your nodes.
From the keyboard, as tag chips
You don’t need to reach for the dropdown. Start typing a node type’s name in the search field and its full name appears as ghost text with a Tab hint.

Press Tab to turn it into a chip. The search field clears so you can immediately type another type name, or start typing the title you’re actually looking for.
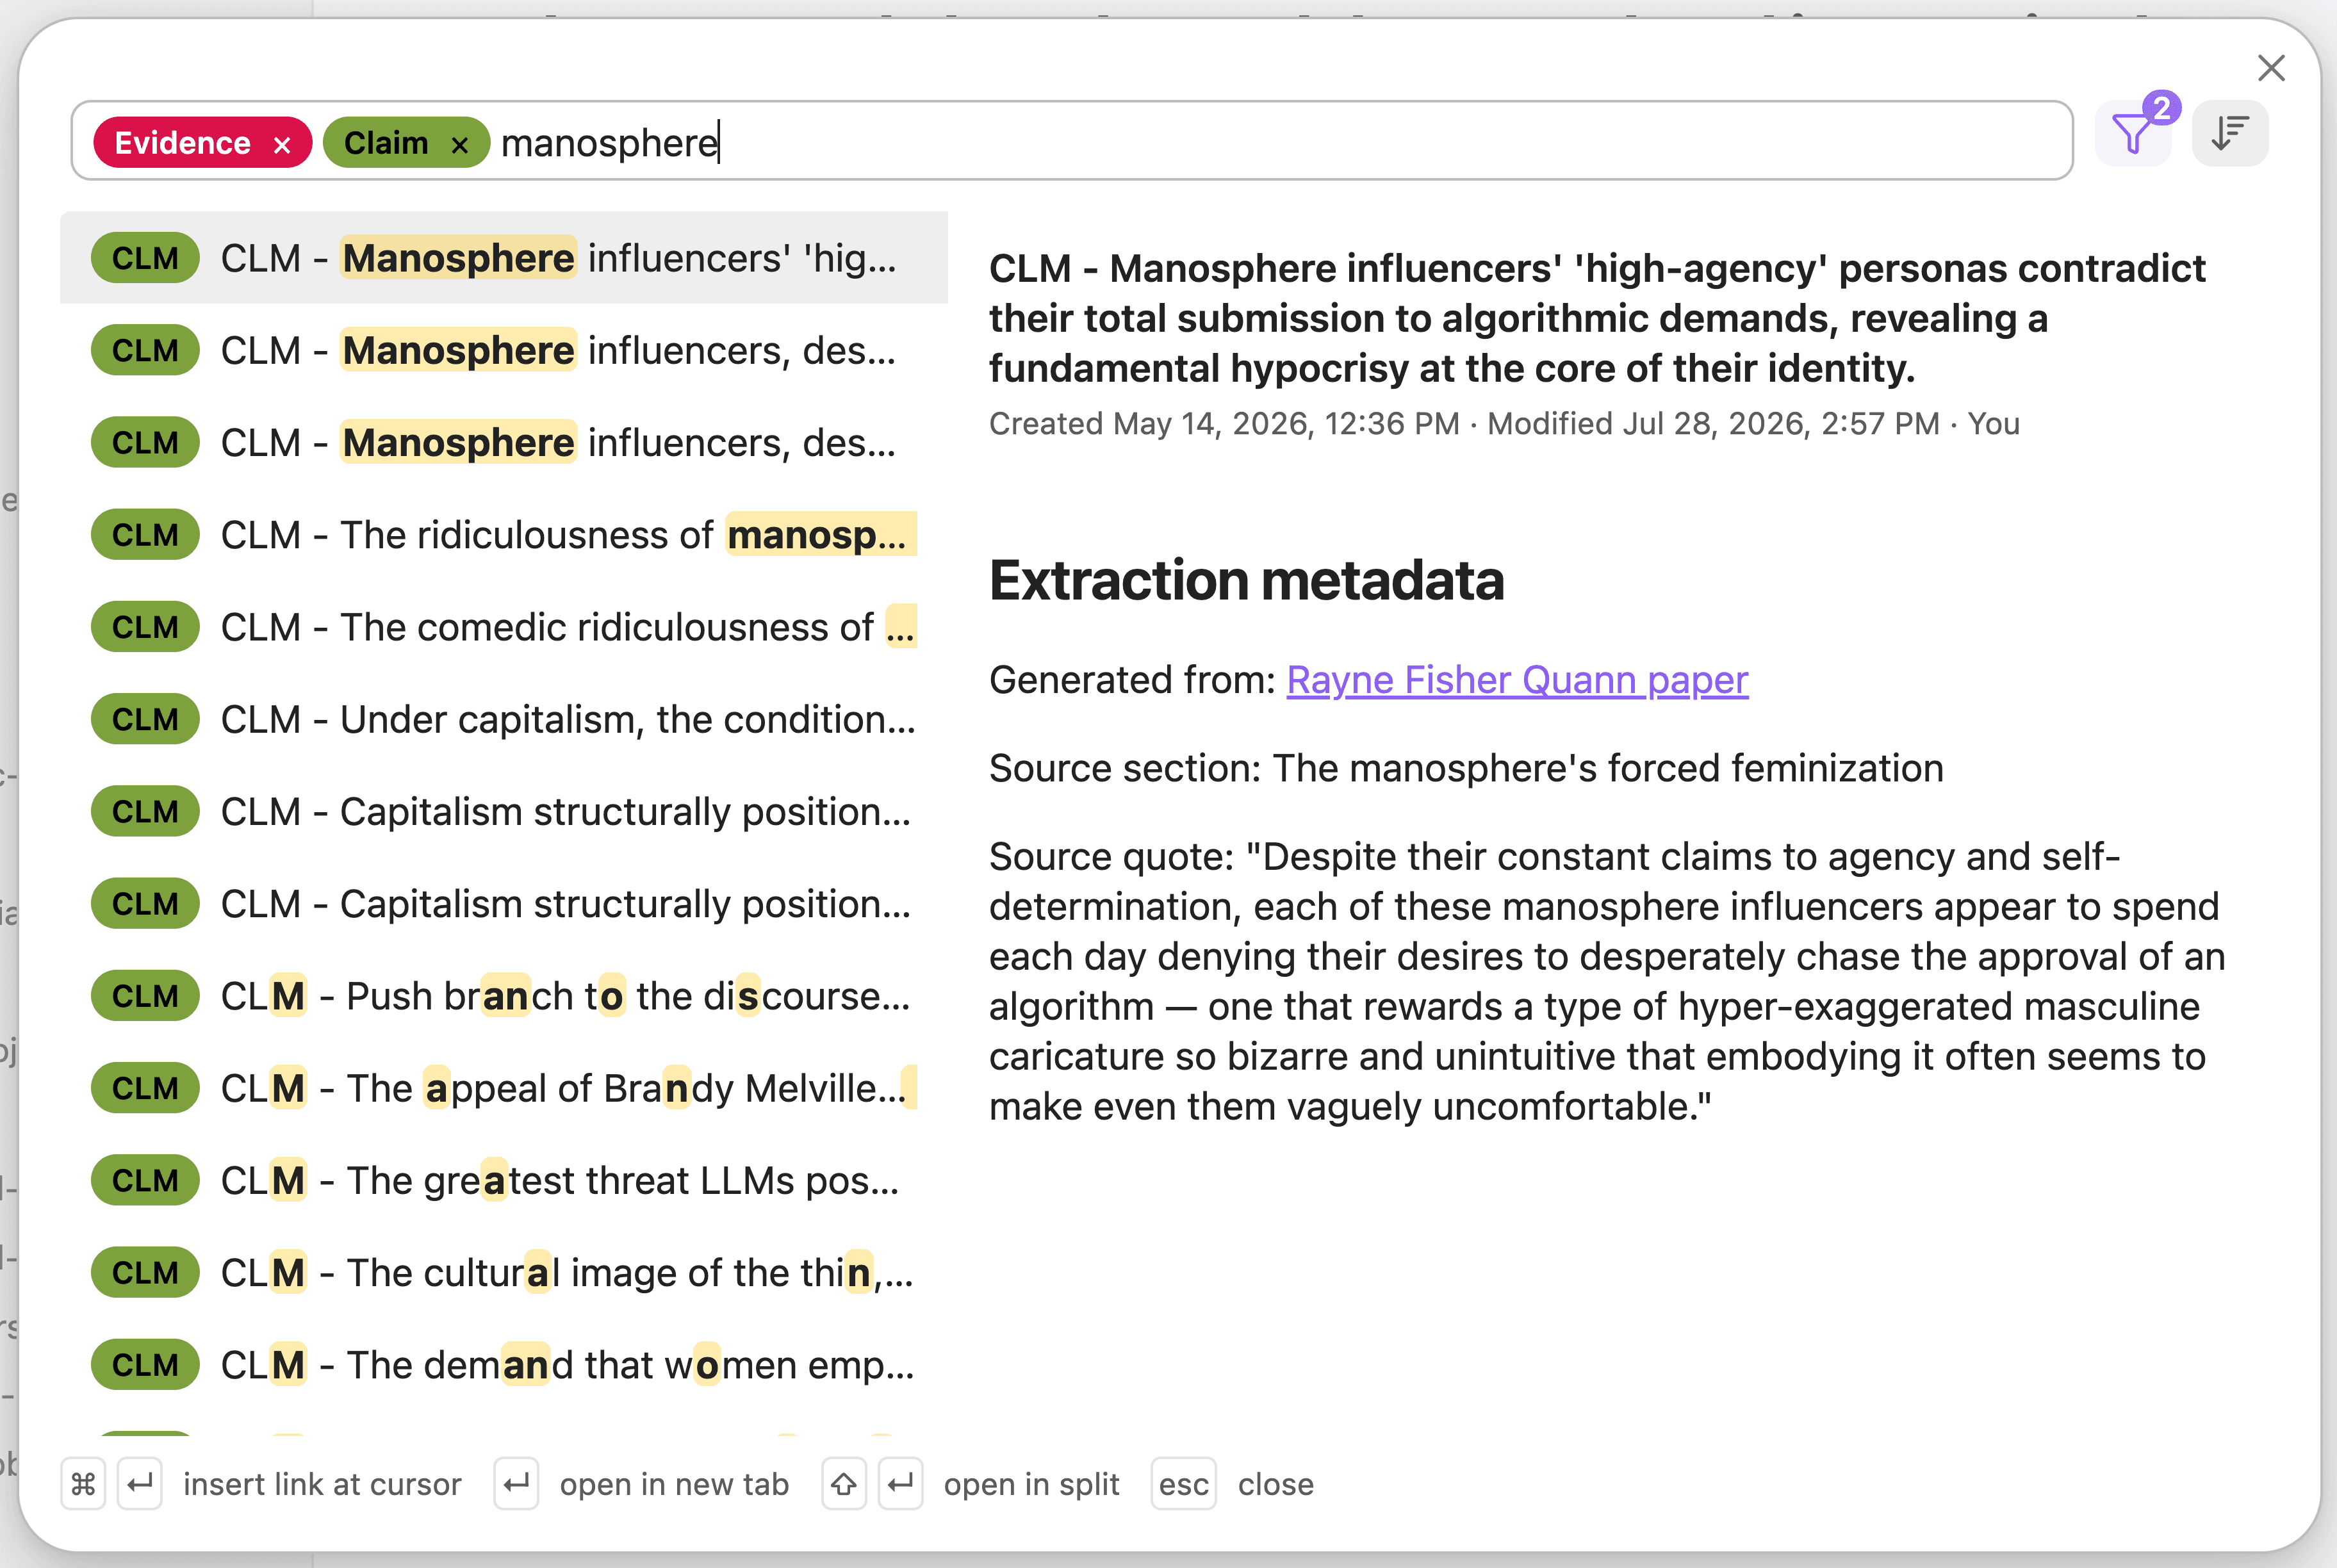
Once you have chips:
Backspacewith the cursor at the start of an empty field highlights the last chip; press it again to remove that chip←and→move between chips, andBackspaceorDeleteremoves the highlighted one- Typing an ordinary character while a chip is highlighted returns you to the search field
- Clicking the
×on a chip removes it
Sort the results
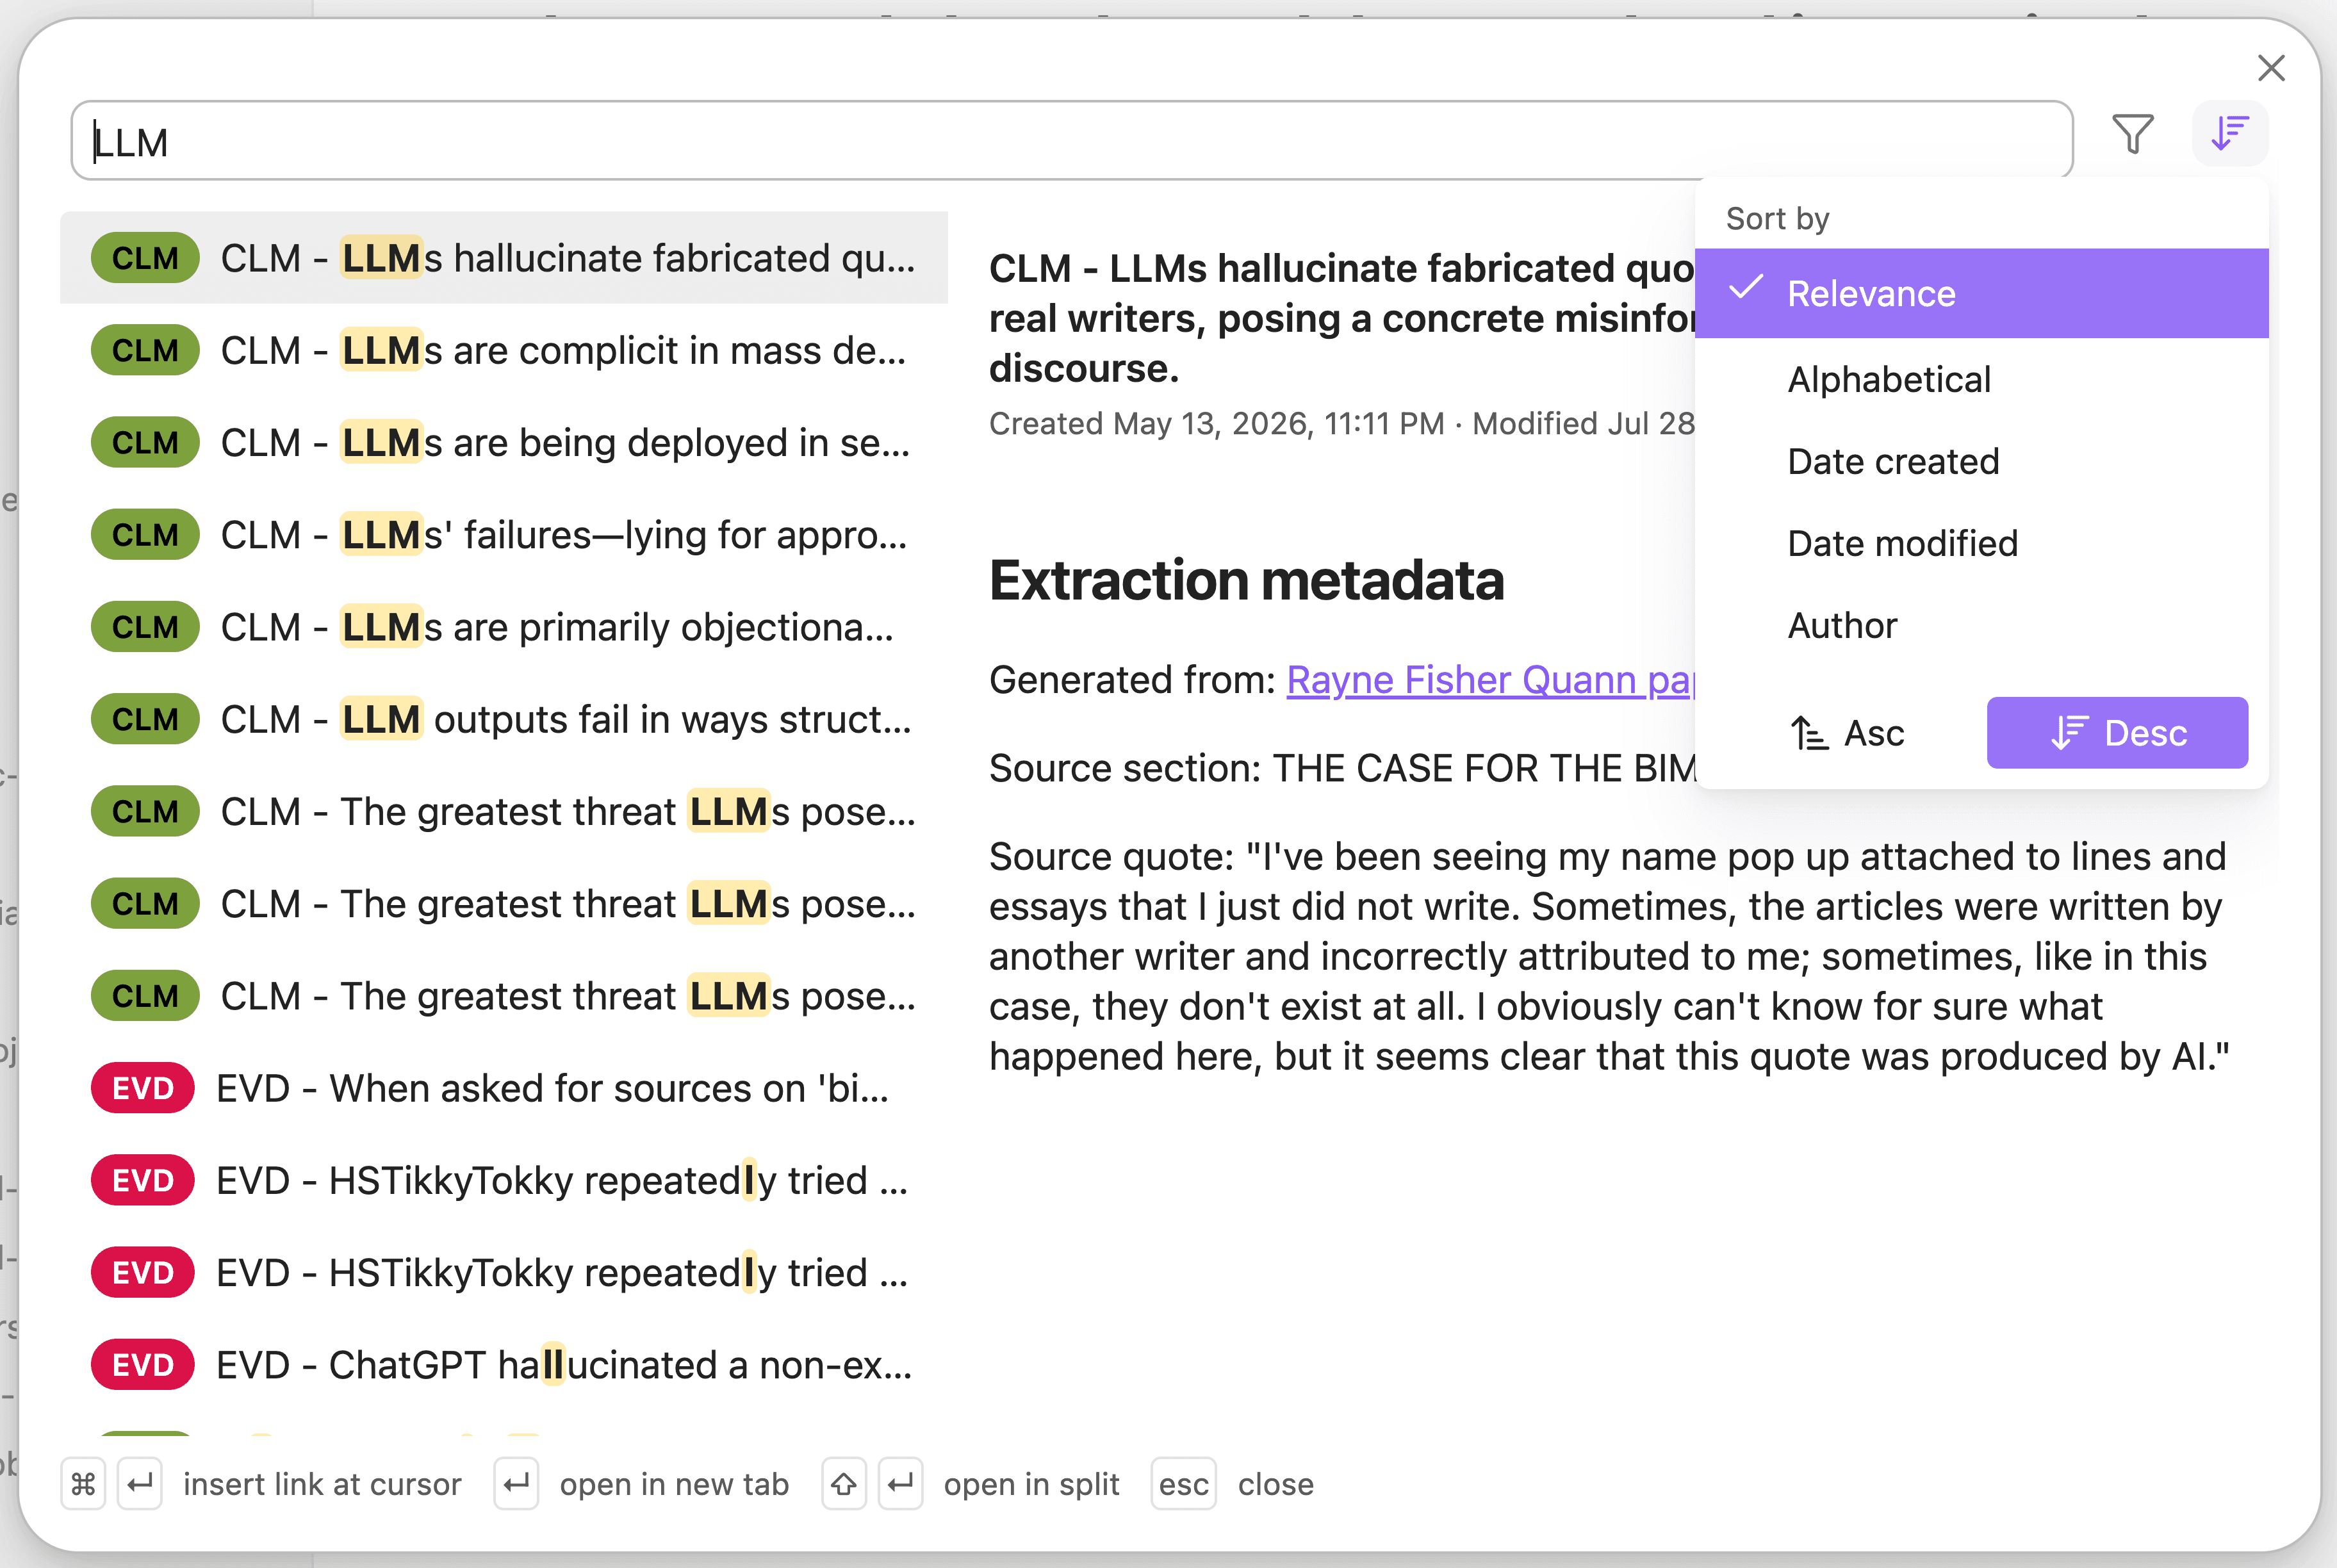
Click the sort icon to choose how results are ordered.
| Sort by | Descending | Ascending |
|---|---|---|
| Relevance | Best match first | Worst match first |
| Alphabetical | Z to A | A to Z |
| Date created | Newest first | Oldest first |
| Date modified | Newest first | Oldest first |
| Author | Z to A | A to Z |
Results are sorted by Relevance, best match first, until you change it. Switching dimensions resets the direction to whichever one reads naturally for it — newest first for dates, A to Z for alphabetical and author — and you can then flip it with Asc and Desc.
Notes with no resolvable author sort after every named author, in both directions.
Note: Sorting applies to all matches, not just the ones on screen. The list displays up to 50 results, so a sort can bring in nodes that were not visible before.
Act on a result
The footer shows what you can do with the highlighted result, and every action there is clickable as well as keyboard-driven.
| Action | Shortcut |
|---|---|
| Insert a link to the result at your cursor | Cmd/Ctrl + ↵ |
| Open the result in a new tab | ↵ |
| Open the result in a split | Shift + ↵ |
| Close the search | Esc |
Insert a link at your cursor
Insert link at cursor is for drafting: you are writing, you need to link a node you can’t quite name, and you don’t want to lose your place. Opening the search remembers where your cursor was, so Cmd/Ctrl + ↵ drops a link to the highlighted result there, closes the search, and returns you to the editor with the cursor after the link.
If you had text selected, the link replaces it.
The link is generated using your vault’s own link settings, so it respects your choice of wikilinks or Markdown links and of shortest-possible or absolute paths.
Note: This action only appears when you have a note open in editing mode. In reading mode, or with no note open, there is no cursor to insert into, so the footer shows only the open, split, and close actions.